
In today's connected world, ensuring seamless internet connectivity is crucial, and TP-Link routers are a popular choice for many households and businesses. Setting up and managing your TP-Link router starts with logging in to its web interface. This comprehensive guide will walk you through the process step-by-step, ensuring you can access and configure your router with ease.
Why Logging into Your TP-Link Router is Important
Logging into your TP-Link router's web interface allows you to:
- Configure your network settings: Set up your Wi-Fi name, password, and security settings.
- Monitor network traffic: Keep track of the devices connected to your network and their data usage.
- Update firmware: Ensure your router is running the latest software for security and performance enhancements.
- Troubleshoot network issues: Identify and resolve connectivity problems.
Pre-Requisites for Logging In
Before you begin the login process, make sure you have the following:
- A TP-Link router: Ensure it is properly connected to your modem and powered on.
- A computer or mobile device: This should be connected to the TP-Link router via Wi-Fi or an Ethernet cable.
- Router login details: The default username and password (usually found on a label on the router or in the user manual).
Step 1: Connect to Your TP-Link Router
To start, ensure your computer or mobile device is connected to the TP-Link router. You can do this by:
- Wired connection: Connect your device to the router using an Ethernet cable.
- Wireless connection: Connect to the router's Wi-Fi network using the default SSID and password provided.
Step 2: Open a Web Browser
Launch a web browser on your connected device. Supported browsers include Chrome, Firefox, Edge, and Safari.
Step 3: Enter the Router's IP Address
In the browser's address bar, type the default IP address for your TP-Link router. Common IP addresses for TP-Link routers include:
- 192.168.0.1
- 192.168.1.1 Press Enter. This will direct you to the router's login page.
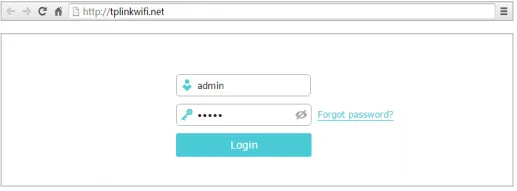
Step 4: Enter Login Credentials
On the Tp link login page, you will be prompted to enter your username and password. The default login credentials for TP-Link routers are usually:
- Username: admin
- Password: admin If you have changed these credentials previously, use the updated ones. Click on the "Login" button to proceed.
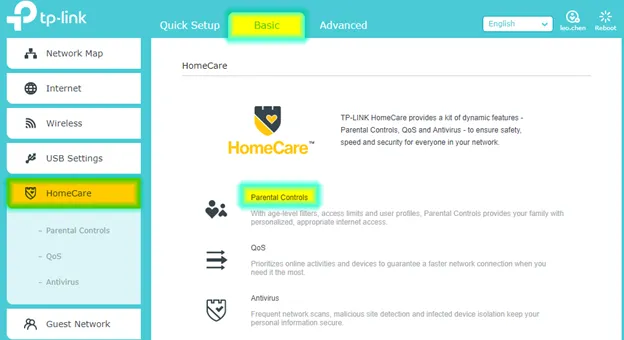
Step 5: Navigate the Router's Web Interface
After successfully logging in, you will be directed to the router's web interface. Here, you can access various settings and configurations. Key sections to explore include:
- Quick Setup: For initial setup and configuration.
- Wireless: To configure Wi-Fi settings.
- Network: To manage IP settings and DHCP.
- Advanced: For more detailed network configurations and security settings.
Step 6: Changing Default Login Credentials
For security purposes, it is recommended to change the default login credentials. To do this:
- Go to the System Tools section.
- Select Administration.
- Enter your new username and password.
- Save the changes.
Step 7: Configuring Wi-Fi Settings
To set up or change your Wi-Fi network settings:
- Navigate to the Wireless section.
- Set your SSID (network name).
- Choose a security type (WPA2 is recommended for better security).
- Set a strong Wi-Fi password.
- Save the settings.
Step 8: Updating Router Firmware
Keeping your router’s firmware up to date is crucial for security and performance. To update the firmware:
- Go to the System Tools section.
- Select Firmware Upgrade.
- Click on Check for Updates.
- If an update is available, follow the prompts to download and install it.
Step 9: Troubleshooting Common Issues
If you encounter any issues while trying to log in or configure your TP-Link router, consider the following troubleshooting tips:
- Check your connections: Ensure all cables are securely connected.
- Restart your router and device: Power cycling can resolve many connectivity issues.
- Reset the router: If you forget your login credentials or encounter persistent issues, you can reset the router to factory settings by holding the reset button for 10 seconds.
Conclusion
TP-Link Login Account is the first step towards customizing and managing your network to meet your specific needs. By following this guide, you should be able to access the web interface easily and perform essential configurations. Regularly updating your settings and firmware will help maintain a secure and efficient network.